Showing posts with label Hels' Challenges. Show all posts

Saturday, 20 July 2013

Build me up Buttercup - Hels Sunday Stamper

Hi all!  This week, Hels' Challenge was Build Me Up Buttercup - all about layers.  I did the layers, but stuck with the buttercup idea as well.


Not sure it comes out well on the photo, but there is the main door hanger, which was covered with coated cardstock, and then acetate above that.

So a bit more detail:  I've got back into alcohol inks as a background, so on the glossy cardstock I created a meadow and sky sort of background.  I scraped translucent paste through a flower mask.  As the paste dried it pulled through a little of the ink behind (not much, as in this heat the alcohl ink dries REALLY quickly!!)


I stamped the buttercup twice onto cardstock, and then on to some dried out babywipes!  Someone at work decided to rip into the packet of babywipes, rather than go in through the top, the normal way.  They dried out and were about to be stuck in the bin, but no...  I think I had three stuck togther, and they were a bit like a piece of felt!  Dripped on gold and green alcohol ink and left it to dry.  The cardstock I used detail clear embossing powder over gold ink, then coloured them in with promarkers.

I cut the acetate to size, and dabbed a bit more gold (and pearl) alcohol ink mixative on the back side of it.  I mounted it up on foam squares, which I then had to cover (oh dear, more bling!) with some lovely prima flowers and butterflies.  I had a gilding flakes butterfly left over from the IndigoBlu challenge last week, and if THAT wasn't bling-y enough, a couple of squirts of mica sprays, just to tie it alltogether.  Suspect I may have been a bit heavy handed on that one, but hey, does it shimmer in the sunlight!  And that was the effect I was going for!!

Hope you like!

Resources

Substrate - Stamps Away Door Hanger

Paint and Ink
Adirondack - Alchol inks, various colours
Brilliance ink - Pearlescent Ivy, Galaxy Gold
Promarkers - various

Stamps
PaperArty Hotpicks - HP1009 Happiness
IndigoBlu - Wild Meadow WM1

Bling and other stuff
Dreamweaver Embossing paste - translucent
Prima Sunrise Sunset flower stencil
Prima flowers and butterflies, mainly Engraver range, I think...
Stampendous embossing powder - detal clear
Acetate from stash
IndigoBlu Megaflakes - Lancashire tart
Cosmic Shimmer Shimmer mist - tarnished gold, bronze blush

Monday, 1 July 2013

And I heard Mr Young sing about her... Hels Sunday Stamper Challenge

Sweet home Alabama
Where the skies are so blue
Sweet Home Alabama
Lord, I'm coming home to you

Oh yes, it's in  my head now, Hels!!  I love this song, and the sentiment.  So Hels set us the challenge of Home.

I adore these Darkroom Door stamps, and the sentiment is so good too.  It also fits quite well with a Crowded House song I'd much rather live in a caravan in the hills, than a mansion in the slums - another one of my favourite bands...

Anyway, enough.   I started with a Kraft tag, which I swooshed through distress stains, including Tarnished Bronze.

I stamped the cowslips in three different colours, then added my favourite Tim birds.

I stamped one of the Darkroom Door cabins, and ripped up the edges, using some of the techniques in Tim's June tag (just haven't got to THAT this month...) and the same sort of thing for the sentiment.

The ribbon had the same sort of treatment with the Distress stains, but had to add a touch of Cosmic Shimmer Bronze blush, a) for the bling and b) to tie it all together.


Resources

Ink and Paint
Archival Ink: Jet Black, Monarch Orange, Venetian Orange
Distress Stain: Wild Honey, Mustard Seed, Tarnished Bronze
Distress Markers: Wild Honey, Mustard Seed, Brushed Corduroy, Vintage Photo, Pumice Stone

Stamps
Darkroom Door: Home Sweet Home DDRS041
Stampers Anonymous: Nature's Moments CMS001, Mini Ornates 064

Bling and other stuff
Cosmic Shimmer Mist: Bronze Blush

Sunday, 16 June 2013

My Guy - Hels' Sunday Stamper Challenge

Hels Challenge this week was one for Father's Day, My Guy. 

My big thing this week was to use one of the canvas boards I found on ebay, and see if they might be a good substrate for the kinds of effects that we did on the Just Scrapbooking retreats.  I think they will be great, and I have spotted that there are 12 x 12s on his website...mmmm, I can feel a purchase coming on!  Anyway, sort of followed Hels' guide this week, except on canvas board.


Painted it up with cream and brown acrylic paint, then stamped liberally with three different background stamps: script, cogs, and the french advert.  Remembered to dry in between each layer this time...


Moved on to the back side of Centura Pearl to do my stamping.  Had a few goes as the middle of the stamp did NOT want to play.  This is where Indigo Blu's slim jims come to the fore.  Finally got it to stamp properly, so dried it, and then used a waterbrush and distress inks to colour in.  Distressed the edges, and twisted two colours of bakers twine together, adding the Wish token.


I'm not sure where I saw this (might have been Helen's layout at Hatton Court last week), but somewhere I saw UTEE used as a glue, and thought it would work on this, especially as the canvas board is so lovely and robust. I melted some plain clear UTEE and poured it over where I had place the three flat cogs.  I then used my heat gun to soften it back up a little and added the real cog and spring and the two spiral wires.


I went around the edge with a gold paint dabber to close it off.


Whilst the boards are clearly sturdy, a cropodile can still go through them!  Wire and baker's twine twisted together to create the hanging.

Yup, I can thoroughly recommend these boards!


Resources

Substrates
Canvas Discount boards 15cm x 15cm
Centura Pearl

Paint and Ink
PaperArtsy: Nougat
DecoArt Traditions: Quinacridrone Gold
Adirondack Paint Dabber: Gold
Distress Ink: Vintage Photo, Bundled Sage, Frayed Burlap, Antique Linen
Versafine: Vintage Sepia

Stamps
PaperArtsy: Gentleman Plate 1, Cogs (mini), Old Text (mini)
Stampers Anonymous: Papillion CMS106

Bling and glitz
Ranger UTTE: clear
From Stash: Wire, Bakers twine, eyelets, cogs, and medal

Sunday, 2 June 2013

Follow the Dream - Hels Sunday Stamper Challenge

Hi all, got a busy week this week (pesky work getting in the way!!), so I have got my act together and made my entry for Hels' challenge straight away.


There's a bit of a story to this one... I started work almost exactly 32 years ago (how can that be??!). I started off in a bank back in the good old days, when we worked for a service industry, and the manager knew everyone.  I really enjoyed it, and I could see a career path, which allowed for the fact that I was married to someone else in the bank. (Keeping up??!) Now, said husband was a surfer, so we spent as many weekends as possible down in Cornwall, me watching, and him surfing.  I loved Cornwall so much, my dream was to be Admin Manager of Penzance branch.  So this piece represents my Dream back then; a split screen Vee-Dub, living down near Lamorna, with crocosmia all over the place!

Ok, that's the explanation!  Here's the recipe!  Started off with the Stamps Away Camper van.  I painted all the pieces up with acrylics.  The headlamps were covered with silver dabber, then a coating of glossy accents.


The label was painted up with Distress Stains, and then oversprayed with mica to give the shimmer I remember in the sy and over the fields.  The stamps around the edge are there to give the impression of crocosmia - I haven't found a stamp for crocosmia yet!!  Because I wanted to have the stems in green and the tops in orange, I used Distress Markers. Why haven't we got the seasonal specials in the markers yet??  Then I would have used the Ripe Persimmon - would have been a much truer colour.


The sentiment may strike a chord with any of my school chums who may be looking at this - shall we Follow the Gleam, girls??  Paraphrasing the Sunny Hill motto, I stamped all three words in Brilliance, but embossed the Dream word to make it pop a little more.

Glued it all together, and hey presto, I am 32 years younger!!  (If only...)  Hope you like.


Materials

Substrates: StampsAway Medium label shape and Camper Van

Paints and Inks
DecoArt Americana: Soft Blue, Lamp Black
PaperArtsy Fresco Finish: South Pacific, Nougat
Adirondack Paint Dabber: Silver
Distress Stain:Shaded Lilac, Weathered Wood, Bundled Sage, Chipped Sapphire, Picket Fence
Distress Marker:Spiced Marmalade, Peeled Paint, Dried Marigold, Pine Needles
Distress Ink: Ripe Persimmon
Brilliance: Galaxy Gold, Peacock

Stamps
Darkroom Door: Discover DDRS090
ClarityStamp: Wild Poppies, Bullrushes, Hedgerow Flowers
Hero Arts: Happy Upper Case Alpha LL243

Bling and Other Stuff
Stampendous Embossing Powder: Detail Gold
Cosmic Shimmer Vintage Mist: Antique Green
That Special Touch Mica Mist: Warm Gold, Azure

Tuesday, 28 May 2013

Diamonds are a Girl's Best Friend - Hels' Sunday Stamper Challenge

Hi All!  Hels' challenge this week revolves around embossing, and UTEE (Ultra Thick Embossing Enamel), which is lovely stuff.  Her challenge is Some Like It Hot (because you have to melt UTEE/embossing powder to make it work).  When I heard that, I thought of Marilyn dancing with all the chaps, and singing Diamonds are a Girl's Best Friend.  Yes, yes, I know, that's Gentlemen Prefer Blondes, but there's no accounting for how my neurones work! So this is my entry for that challenge.


The painted background is meant to evoke a red silk dress, or a theatre back drop.  This is acrylic paint in a few layers, including the lovely London Bus from PaperArtsy, which is so tranlucent! Mmmm.

The background stamps are shadow stamping using Brilliance, so it is a bit hazy, intentionally!  The words are stamped and heat embossed.  When that was dry and cool, I used a quickie glue pen and some ultra fine glitter to add a few more sparkles.  You can never have enough bling!!

On to the UTEE. There are a couple of different mixes in there, so I am not quite sure what colours made which element.  The beads and the frame are both made using a Gedeo Silcon mould.  You might spot that there is glass glitter in there, too, just in case any more bling was needed!  I wasn't sure if it would melt into the UTEE, so I tried sprinkling it into the mould on for the frame and one of the strings of beads, and adding it into the UTEE for the other string of beads.  It definitely has more impact by sprinkling it into the mould.

Inside the frame are my diamonds, which I discovered in a home decor shop, a box full of different sizes for two quid.  Don't think they are real...but they ARE shiny!!  I've adhered them with silicon glue - what a pong!!   Because this goes on cloudy and only goes clear when dry, you have take a bit of a leap that there's enough diamonds in there, to cover it all.  I am a little disappointed that actually the silicon glue isn't THAT clear.  That may be because it has only been drying for 24 hours, and there is some more drying to do, OR I guess, it may be that I crammed so many diamonds onto that area that the air couldn't get at it! 

While I had the Melt Pot out, I thought I would have a go at making a mould from a pair of cufflinks I had, which are bees.  So I mixed up some Siligum (this has two different plasticine-like doughs, which you mix well, then you press your item into it, and count to 10.  Remove your item, and bingo!  A mould!!  I haven't used Mould and Pour, but I guess it works in the same way.) I used the bits of UTEE after making the frame and beads for the bees, because they didn't take too much, and I didn't really mind if they didn't match, because I wasn't going to use them on THIS project.  So now I have two moulds for bees!  A good luck symbol for the chinese!

Hope you like!


Materials used

Substrate: Stamps Away Medium Tag

Paints and inks
DecoArt Americana: Lamp Black, Light Buttermilk, True Red
PaperArty Fresco Finish: London Bus
Brilliance: Rocket Red, Mineral
Versamark dazzle: Frost

Stamps
Stampin Up: Broadsheet Alphabet
Stampers Anonymous: Sketch Elements CMS054
Hero Arts: Happy Upper Case LL243


Bling and other stuff
Ranger Melt Pot
Ranger UTEE: Platinum, Clear
Cosmic Shimmer UTEE: Silver Shine, Blue Raspberry
Cosmic Shimmer Embossing Powder: Viola Black Aurora
Stampendous Embossing Powder: Detail Gold, Detail Silver
Stampendous Frantage Glass Glitter: Black
Martha Stewart Glass Glitter: Silver
Gedeo Silicon Mould: Frames/Picture Frames
Art Glitter: Heart Medallions (gold)
Silver glitter (unnamed)
Siligum
Quickie Glue pen

Wednesday, 22 May 2013

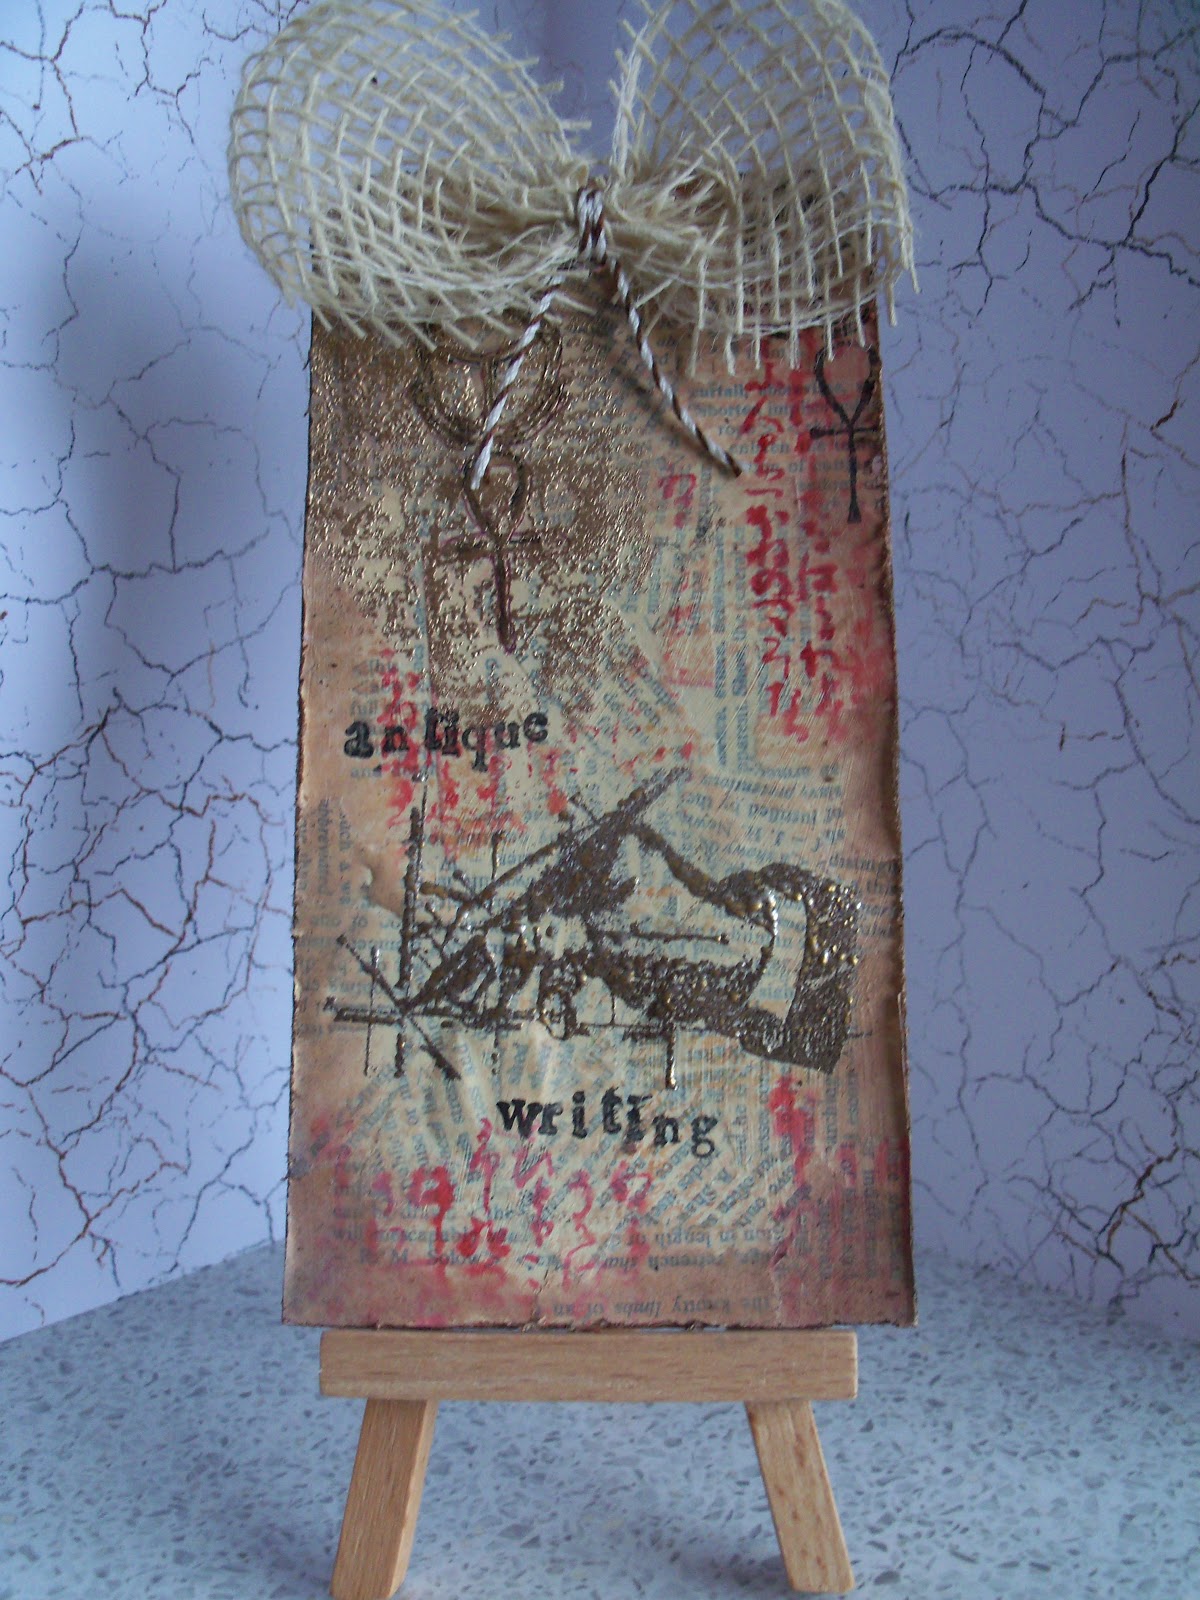
Antique Writing - Hels' Sunday Stamper Challenge

Hels' challenge this week was 'All Those Years Ago', the fantastic George Harrison song.  Whilst I was made all those years ago, I can't enter myself, so I made a tag! 

Seemed to have forgotten to take photos throughout this time, sorry.

Started with a die cut tag, which I covered with torn up book pages (this STILL makes me shiver - I keep looking over my shoulder for the book police...).  I mixed a very pale combination of light buttermilk and Transparent Yellow Iron Oxide - I wanted to keep the paint translucent to allow the book's text to show through.

Over the top, I used a lovely text stamp, I think it's old french, and then when that was dry the chinese (I am guessing here!!) text in red.  And you might spot hieroglyphics in there too.  Some of the text has been heat embossed with gold (at the top of the tag).  I have to admit to this being a boo boo.  I thought the french and chinese text was dry when I added the hieroglyphics...whoops, it wasn't!  However, as with most boo boos, actually it worked, mainly because I didn't put the powder all over the card, but kept it over to that top left hand corner.  I restamped the scarab and the ankh in black.

The writing hand was stamped and embossed with embossing enamel.  I really love this enamel! It's made up of several colours, and while they do melt, you can see the gold, silver and pewter independently.  Oooooh, scrummy....

I distressed and inked the edges, stamped the title, and finished it it off with a bow! 

Materials used

Ink and Paint
Decoart Americana - Light Buttermilk
Decoart Traditions - Transparent Yellow Iron Oxide
Distress Ink - Tea Dye, Fired Brick, Walnut Stain
Versafine - Onyx Black
Versamark Dazzle - frost

Stamps
Paper Artsy - Mini Hand MN31, Backgrounds 6 BG6,  Hot Picks backgrounds HPXT01
Hero Arts - alpha peg stamps LL762
Random hieroglypic stamps - no name on them!!

Bling and other stuff
Claudine Hellmuth Studio Matte Muli Medium
Book pages
Stampendous Embossing Enamel - Aged Taupe
Ranger Satin Embossing Powder - Queens Gold
Hessian 'ribbon' and Bakers twine

Saturday, 11 May 2013

Diamonds and Pearls (of Wisdom) - Hels and Clarity

UPDATE:  SO chuffed!  This made the top 5 of the Clarity Challenge (please note new blinkie down on the right hand side!  Whoop whoop!!

Morning!  Had to wait for glue to dry properly before I could take the photos, or I would have put this up yesterday.  Still, better late than never!


Hels Sunday Stamper Challenge this week was Diamonds and Pearls (another great song, Hels!), but I also had going round in my head the challenge from ClarityStamps 'It's all in the sentiment'.  I decided to combine the two challenges into the piece above.


The base is a Stamps Away fob watch, without the hands, which fits the sentiment that I wanted to use from Clarity.  I also love the dragonfly from Clarity, so this sort of designed itself!

To bring in Hels' challenge requirements, I clearly added my favourite bling, sticky diamonds and pearls (almost too easy!), but also used the diamond strip from clarity which was one of the designs for the Clarity Club a couple of years ago.  The benefit of this strip is, because it isn't mounted, it can be bent a little, to go around the bezel of the watch.

I finally got round to using some of my Frantage enamel embossing powder.  Why have I left this so long??  Woooo, lovely!  It's the aged rose on the diamonds, and aged taupe on the sentiment.  Mmmmm.

For dimension, I opted for both Clearly for Art (for the dragonfly), and shrink plastic for the flowers.

Hope you like it!!


Materials

Substrate: Stamps Away Fob Watch

Inks
Distress Ink: Mustard Seed, Victorian Velvet, Shaded Lilac
Distress Stain: Vintage Photo, Brushed Pewter
Distress Markers: Bundled Sage, Peeled Paint, Fired Brick
Stazon: Royal Purple, Hydrangea Blue, Fuschia Pink
Versamark: Dazzle Frost

Stamps
Claritystamp: mounted Life is not measured, mounted Dragonfly, remountable Diamond Strip, remountable Petals set, remountable Flower set

Bling and other stuff
Stampin Up: Rhinestones, Pearls
Stampendous Frantage Embossing Enamel: Aged Rose, Aged Taupe
Clearly for Art Clear
Shrink Plastic Clear

Tuesday, 30 April 2013

Blue - Hels Sheridan Challenge

Blue Jays - ah, an album from my youth...Justin Hayward and John Lodge....  Anyway, Hels' challenge was BLUE.  Here is my entry...


It's made up of 'caught in crystal' acetate, folded card, and lots and lots of stamps!!

I started with the acetate.  This is done by sprinkling glitter (in my case, quite a lot of glitter) onto acetate, adding some alcohol inks, and then PVA glue.  Having done this a couple of times, I have learned that this takes a LOT of PVA, so I use the cheap stuff, and I also make sure that the final layer (tissue paper) is quite well pushed down into the glue.  Otherwise when it dries the tissue paper can hang off a bit.  This time, just to make sure, I dripped a bit more alcohol ink on the back of the tissue, where it looked like there wasn't much colour.  Then you leave it dry (and drip) overnight.  You aren't able to see how much glitter there is in there!


I cut down a 12x12 piece of card to 10x4 and then split that in half lengthways, leaving the final 2 inches uncut.  Then I valley and mountain folded each leg, so that I was left with a little pad measuring 2x2 and a half.


Then from good quality stamping card (not sure which one, I managed to use some of my offcuts) I cut a load of squares to fit (1 and three quarters).

Some of them have been stamped with distress ink, and then the ink pulled out with a water brush (a technique from Hels herself, thanks Hels!).

Others were stamped with Stazon or Brilliance - these were the sentiment squares.

Then, I glued two pieces of the acetate to the front and back of my origami, and used the Crop-o-dile to set in to eyelets in each.  Lovely blue ribbon to hold it all together.  Finally, I added 3 butterflies and a few teeny weeny rhinestones.

More blue than you could shake a stick at, I think!!


Materials

Ink
Adirondack alocohol inks - many and various!
Distress Inks - Faded Jeans, Chipped Sapphire, Peacock Feathers, Tumbled Glass, Salty Ocean, Stormy Sky
Brilliance - Sky Blue, Pearl Poppy, Galaxy Gold, Mediterranean Blue

Stamps
Stampers Anonymous - Mini Blueprints 3 (CMS150)
Stampers Anonymous Clear Artistry - Flights of Fancy, Urban Grunge, The Journey, unnamed
Martha Stewart STamp and punch - Butterfly

Bling and other stuff
Rhinestones
Art Glitter - Monchromatic Blue
American Craft - ribbon
Crop-o-dile and eyelets

Tuesday, 23 April 2013

Paper Sun - Hels' Sunday Stamper Challenge

Hels' Challenge this week inspired me (last week's is on the shelf not looking happy at all...) - not only do I love Steve Winwood, the tutorial on Paper Blocking spoke to me, too.  I've not been great at keeping my offcuts, but I will now!!


So, Paper Sun - the Sun is the only bit that ISN'T paper, but this is what we have...

I started with one of the Stamps Away Medium tags, which are pretty solid, and don't seem to mind not being sealed before starting off.  I covered the tag with bits of paper cut from a few 6X6 sheets. 


When covered, I mixed Americana paints and brushed a wash over the lot.  With hindsight, the wash could have been a bit thinner, but hey-ho!  Then I sealed it, and created the shadows around the central blocks.  Hels suggests her magic pencil - couldn't find my pencil sharpener, so adapted, and used a black watercolour pencil, and I'm pleased with this, which means if I want to go away from black as a shadow, I can!  Whooppee!

Then I created a mask for the sun, and scraped a dollop of stencil paste into the hole, leaving it pretty textured.  When it got a bit of a skin, I dripped a little Dylusions on to the paste, to give it a sunshine colour. I also used my watercolour pencil to create a bit of a corona around the sun.  I have  afeeling that it will be a lot more transparent tomorrow, when it is fully dry.  But you can see that the blocking underneath is already visible.

Then Stamping!  All stamps on this are from Lavinia, which I have been ignoring recently, and I'm not sure why!  Believe was stamped on a piece of card and embossed with some glittery embossing powder, then the card ripped and edged with embossing ink, and the same powder added and heated.  I swooshed the card through some spritzed Distress ink, when it had cooled a little, and set it aside to dry.  Then it got set on foam pads to give some dimension, as well as taking it off the page.


The ribbons were coloured in the same way (with the addition of some Cosmic Shimmer mica spray - otherwise where would the bling be???!), and I used the same DI to edge around the tag, after I'd done all my stamping, just to give it some definition.

As a first attempt at paper blocking, I'm quite pleased.  I guess my learnings are (spot the tutor!!):
  • don't cut the paper too regularly - my widths were all a bit samey
  • think about the stamp and its placement - not easy to stamp if you have several layers (might be easier with a rockablock, maybe?)
  • Use more varieties of paper
  • Put the spatula in water, when you've finished (doh!!)
Materials

Substrate
Stamps Away - medium tag

Odds of paper
Lavinia stamps - there aren't any names on them, but: Unicorn, Allium, Foxglove, Vine, and Beleive

Inks and Paints
DecoArt Americana - Indian Turquoise, Light Buttermilk
Dylusions - Pure Sunshine
Archival Ink - Cobalt
Adirondack - Eggplant, Denim, Purple Twilight
Distress Ink - Salty Ocean, Tumbled Glass, Chipped Sapphire

Bling and other stuff
Dreamweaver - Embossing paste Translucent
Glue n'Seal
Cosmic Shimmer - Vintage Mist Astral Mystery
Faber-Castell - colour grip watercolour pencils
Stampendous - Stamp-n-stuff embossing powder - Golden Ocean (blue powder with gold glitter, oooo lovely!)

Monday, 8 April 2013

Hip to be Square (Hels' Challenge)

Hi all

Hels set a great challenge this week with Hip to be Square.  This gave me lots of possibilities, and here is my entry - Butterflies are Self Propelled Flowers.


The base is a Large Label Shape from Stamps Away, which I have had sitting in the cupboard for a little while.  It was smooshed with some acrylic paints, and edged with a distress stain dabber.

I cut the five squares with a Spellbinders die, and painted them up, two with acrylic, and three with distress stains.  These latter were given a quick coat of gesso to give them some tooth.  All were edged with a tarnished brass distress stain dabber.


I used the lovely squares Finnabair stencil from Prima with two colours of distress ink on two of the squares.


Then I set to with stamps!  The inchies (butterflies and flowers) are from Inkadinkado.  The sentiment is from Sheena Douglass and the multicoloured butterfly is from Stampin' Up. This is a MASSIVE butterfly in real life, but when stamped onto shrink plastic and shrunk, it fit brilliantly with the scale of the piece.  It's coloured with watercolour pencils.  It never ceases to amaze me how intense the colours go on shrink plastic - they were really quite wussy before I got the heat tool on it!

The other two butterflies have been die cut using Tim's Movers and Shapers dies, stamped on white Clearly for Art with a Studio 490 stamp.  Then heated and bent.


The flowers were die cut with a Sizzix die, from a Websters' Pages pad I had, and made 3d using Hels' great tutorial, and dipped into UTEE.  Thanks, Hels, for inspiring me to get the MeltPot out!  Just a little bit of copper glitter for some bling.

Assembled using Cosmic Shimmers glue and some silcon for height for the central plaque, and some more bling in the shape of those square copper rhinestones.


  Enjoy!


Materials used

Substrate:  Stamps Away

Inks and Paints
Acrylic paint: Daler Rowney - Sap Green, Metallic green, Naples yellow, Zinc mixing white
Distress stain - Peacock feathers, Chipped sapphire, Spiced marmalade, Bundled sage, Tarnished brass
Distress ink - Chipped sapphire, Wild honey
Archival ink - Monarch orange, Venetian orange, Cobalt, French ultramarine

Stamps
Studio 490 - LCS051 Art Gone Postal
Inkadinkado - 60-30159, 60-30165
Stampin' Up - Swallowtail
Sheena - SD-LBS-CLRS Flying Colours

Dies
Sizzix - butterflies 657209, flower layers no 5 656079
Spellbinders - Classic squares large S4 126

Other stuff
Cosmic Shimmer: UTEE clear and dries clear glue
Prima Stencil, Sunrise Sunset squares
Websters Pages paper (for porcelain flowers)
Studio 490 Clearly for Art
Shrink Plastic
Derwent metallic watercolour pencils
Diamond sparkles - Copper penny glitter
Papermania - Mosaics tiger eye