Showing posts with label Prima. Show all posts

Monday, 26 May 2014

Q&L - Music - Tiny Dancer

Hi all.  Time for the fortnightly quotes and lyrics challenge from the Craft Barn again.  This time it is Passion and Music - oh yes.  So, sticking to my 'I must have seen them live' criteria, I went for Tiny Dancer, by Elton John.  I think Madman Across the Water was the first album of his I bought, and I remember dancing round my bedroom to Tiny Dancer (and Indian Sunset... what a song, what an EPIC song...), I dreamt of marrying a music man...  That went well - NOT!  Anyway...

Blue Jean baby, LA Lady, seamstress for the band
Pretty eyed, Pirate smile, you'll marry a music man
Ballerina, you must have seen her dancing in the sand
 
Hold me closer Tiny Dancer
Count the headlights on the highway...


The Madman cover is embroidered denim, so I wanted to start with blue.  As I have been on a Kate Crane weekend (another one, at The Stamp Attic), and Kate does love a good colour wheel, I went with green. It had to be Dylusions!  I added a little Radiant Rain, for bling.
 
Dylusions reacts with water, so I used a mask or two and dabbed through it, with water, and with distress inks - that was a good effect!
Picking up on the seamstress idea, I used his Holtzness' blueprint stamps top and bottom, and reverted to handwriting (I must restart the calligraphy classes) the lyric.
 
Finally I added a couple of embellishments, a dress form, and some rain drops to act as headlights.  I love the way the glue soaks up the dylusions.
 
All in all, I'm pleased with it, so I hope you like!
 
 
Resources
 
Paint and Ink
Dylusions: White linen, After Midnight, London Blue, Polished Jade, Black Marble
Radiant Rain: Pearl Blue
Distress Ink: Black Soot, Stormy Sky
Archival Ink: Jet Black
 
Stamps
Stampers Anonymous: Mini Blueprints CMS150
 
Bling and other stuff
Tando Creative Mask: Music
That Special Touch Mask: Piano Keys
Studio 490/Blossom Bucket: Mannequin
Prima: Raindrops
Robins Nest Dewdrops: Fairy dust
Crafty Notions: Stellar Flash

Saturday, 19 April 2014

April - Kathryn Wheel Calendar challenge

Over half way through April, and I finally do my Calendar page!  Busy month...  Anyway, here are my pages.


I started by painting the pages with fairly runny gesso, and then brushing through with two shades of green, with added iridescent shimmer (not enough, methinks).

While the paint was still wet, I used a plastic tube to make circles/bubbles, some right through to the white, and some through as far as the lime green.

I cut the card for the pockets, and while still flat, stamped the decoration in archival ink.  I used red line tape to stick them down.  I used the same card to cut the daily ribbons from, and numbered them for April, adding SAT and SUN (so I could work out which go in which pocket).


I doodled (yes freehand DOODLED!) April, with a little very basic zentangle - it's not really my thing. And then, out with the various white pens to add a little perspective to some of the bubbles.

Hope you like!


Resources

Paint and Ink
PaperArtsy: Limelight
DecoArt Traditions: Phthalo Green-Blue
Windsor & Newton: Iridescent white
Pebeo Studio White Gesso
Archival Ink: Jet Black, Dandelion, Sap Green

Stamps
Prima: Stationer's Desk, Finnabair dots

Bling and other stuff
Faber Castell Pitt pens - Various
Pilot super colour pen - White
Sakura gelly roll - Starlight

Sunday, 2 February 2014

Q&L - Silence

This fortnight's challenge from the Craft Barn is Silence or Dazzle.  I went for silence (not my usual approach!) as my first thought was The Sound of Silence, but I am creating a bit more difficulty for myself this year, by trying to keep to my real core favourite music...so I went for I Can Hear Your Heart Beat, one of my favourite Chris Rea songs, another old song, from Water Sign.  I suspect most of my lyrics will come from 70's and 80's.


I'm using this massive A3 sketch book, so I have plenty of space to work in.  I found a set of old map prints and knew this was going to be my base.  I trimmed it up, and gave it a really good sanding, because it had a high gloss finish.  I chose a map as a back drop, because of a line in the song 'I'm in a European disco, and it's thumping up the beat' - so welcome to Marseilles!  I also distressed the  edges, and ripped into it to age it.


 Before.........  and after!


Then I set to with ink and stamps!

I wrote out the first few lines on card, which I then coloured using promarkers. I added a doodle of a heart monitor output on that lyric (it's NOT my heart beat, it's not fast enough!), and then glued it all together.


Hope you like!


Resources
 
Substrate: - Endeavour City Maps Print Set, Marseilles
 
Paint and Ink
Archival: Watering Can, Orange Blossom, Venetian Orange, Potting Soil, Red Geranium
Distress Ink: Tea Dye
Promarkers: Vanilla, Satin, Spice, Cinnamon
 
Stamps
Prima clear stamps: Finnabair Brickwork, Distress dots
KaiserCraft: Film Edges
 
Bling and other stuff
hmmm, no bling?

Thursday, 10 October 2013

Finnabair's Prima journal - birthday pressie!

A few weeks ago, I was lucky enough to do some classes with Finnabair (Anna Dabrowska)  in Swindon.  Such fun!  What did I learn?  That when you think you have applied enough trinkets, you really haven't!  Keep going and add at least 6 more!


We made up a pair of Prima journal covers, a la Finn.  I LOVED doing this, but as I was decorating it, I realised that my sister would be getting it as her birthday pressie, as she is always looking for journals (well, she'd probably call it a notebook) to keep track of her electricity reading.  Yes, I know.  Electricity readings.  Not really the stuff of scrapbooking heaven, eh?

Anyway, I won't go into all the gory details of how we decorated the covers, except to say...mmmm Primary Elements!  You can't go wrong with Black Emerald, which is a lovely DARK blue green.  Love it.

The inside dividers were packaging!  Cut with Sizzix on the edge dies, then gessoed, and painted up.  By now, if you haven't realised that I like mica, glitter, metallic stuff, well, you haven't read many of these pages, have you!  So flat base colours, then washes and glittery stuff to finish.


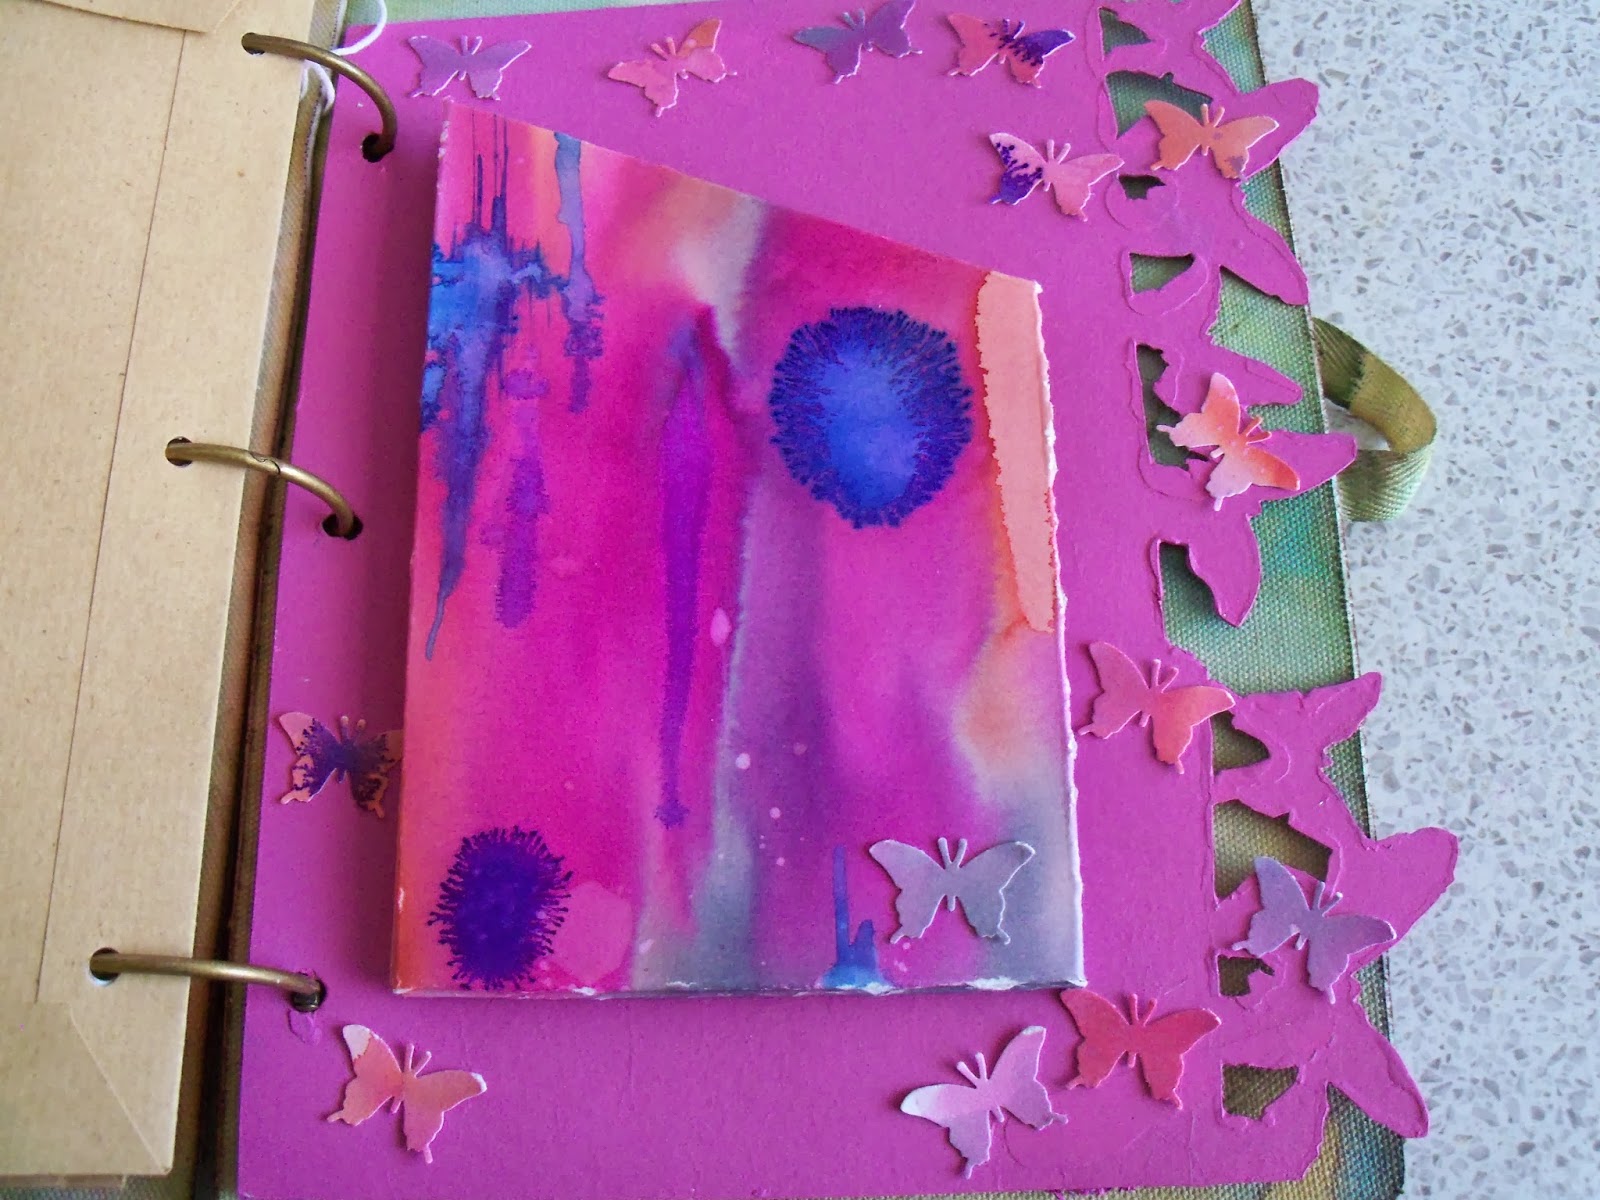
I made up a pouch for one of the dividers, using watercolour paper coloured with Brusho pigments on a Linda Knight session a couple of months back.  The colours looked right!  I also punched butterflies out of the remnants.  They glitter!  A lot!


Then I found some brown A5 envelopes, and covered them with matching gelli print papers - I think probably from an Andy Skinner session - but may have been with Linda Knight - in the pile of gelli print papers without a home...


A couple of other white A5 envelopes I tried something else...don't know why I haven't done this before...swooshed distress ink onto my mat, and instead of spraying with water, sprayed with pearl cosmic shimmer!  Wow!  Overstamped with a huge lace background stamp in a couple of different Archival inks, and then added some embellishments, which reflect my sister's great age (hah!  She'll kill me for that!!)  Land of The Giants...


On one of the envelopes, I had been playing with Stampboard - and a PaperArtsy stamp in several colours, and it fit with the theme.  So on it went!


Then I cut loads and LOADS of different papers to fit, and used my cropodile to hole punch them. 


To finish off, I used the remnants of one of the gelli papers and punched a scalloped edge.  I stamped the letters and the tags, then used he matching punch to punch them out.  Touch of stickles, and hey presto!  One birthday card, for an aged relative....  Yep, dead again!

Hope she likes!!

Resources (A selection...)

Prima Journal Covers, and various Prima embellishments - and other embellishments
Stampboard

Sizzix on the edge: Butterflies and Houses

Andy Skinner Mask (the children on the gelli plate)

Distress inks
Stewart Gill Paints
PaperArtsy Fresco paints
Brusho pigments
Cosmic Shimmers spray
Primary Elements, added to water, and sprayed, various colours

Stampin' Up: Tag stamp, and punch
Martha Stewart Butterfly punch
Hero Arts: Letter stamps
PaperArtsy Antique butterfly stamp

Tuesday, 8 October 2013

Finnabair's Canvas - completed

A few weeks ago, I was lucky enough to attend a weekend retreat in Swindon, with Anna Dabrowska (AKA Finnabair).  One of the things we did was a canvas, but it wasn't quite finished in my eyes. 

Then...I found a lovely Artemio frame at The Stamp Attic, and I knew what I wanted to do! 

We spent the weekend doing a lot of spraying, using mainly Primary Elements in solution.  These are highly pigmented mica powders.  MMMMMM. My favourite colour is called Black Emerald, and because it is my favourite, it was all over the canvas.  So it needed to be all over the frame.  So I had to order some.  Note to self, next time, get a HUGE pot!  I have a feeling I will end up painting a wall with it! 

Not sure I am going to remember every step, but here goes...  The box canvas was covered with torn strips of canvas and lace and then embellished to within an inch of its life.  The photo is a random lady, cut out, and protected from the painting and spraying that went on around it, but then dabbed with a tiny bit of pink ink (probably Picked Raspberry DI, knowing me!).  Black and white gesso, meeting in the middle. Then sprayed with the Black Emerald..  I suspect looking at it, it may also have a touch of Olive Vine, or maybe Kiwi sprayed on!


Ok, the frame.  A light sanding, then painted with white gesso.  Embellished to match the canvas, and painted all over with black acrylic.  Dry brushed with white paint from one corner.


Here comes the Black Emerald!  I made up a fairly thick solution in a spray bottle, and mostly sprayed from one corner. Then decided to go for it, and basically sprayed almost all of it!  I did leave the white corner a little light... 


When dry (I'm getting better at leaving things to dry...), I glued on the rain drops, on the frame, and on the canvas. Wish I had some more of them, no idea where they came from, but they did a good job of tying the canvas and frame together.  I love how they magnify the drops of mica, or the brush strokes.  Really lovely!

Ok, off to find ANOTHER bit of wall.  Hope you like!

Resources

Substrates:  Canvas, Artemio Box frame

Embellishments:  Prima in the main, with other bits and pieces from my stash (and Finn's!), including lace

Paint etc
Gesso
Acrylic

Bling
Primary Elements: Black Emerald (and possibly others, don't know precisely what Finn mixed up for us)
Rain drops


Wednesday, 18 September 2013

In the garden - Tando Creative

Hi all.  This week's challenge is 'In the garden'.  In my head, I saw my Mum out in the garden cutting dahlias for the chapel flowers, with an old fashioned, and indeed OLD trug.  So I started off with the 3d basket, and set to, to make it look old!

I ran all the pieces through the big shot with the Harlequin mask.  Several layers of paint later, I used the harlequin mask again and some distress ink, to really knock it back.  I forgot to take a final photo of the replacing of the mask, and the reinking - but you will see it at the end.


Then I die cut a few flowers.  More than a few actually!  I layered them up and created stems out of florist's wire, and glued some card candy over the middle, to hide where the wire went in.


All the flowers were planted into oasis, which I covered with tissue paper sprayed green. Doesn't oasis feel odd? Not sure I like it...  I had also Crop-o-dile'd a few holes through the side walls, and pressed some prima flowers through.


I stamped and embossed in gold a massive butterfly, and then painted it in Twinkling H2Os on the front.  On the back, it got a coating of Alchemy paint, to give that shimmer you see when a butterfly closes its wings.  The finishing touch was a small piece of board painted up, and then stencilled with the leaf mask, and then stamped with 'Time to Garden'.  I had two spare clock hands from somewhere, painted up in the same sort of colours as the trug and the plaque.

And now I have a reminder of my Mum's green fingers!  Wish I had inherited them!!


Now you can see the reinking, where I replaced the mask.  This shot is from the side...


...and here's the butterfly in all his glory, from above.


I've really enjoyed my month as Guest Designer for Tando.  Such a great variety of blanks, and they take paint so well.  Hope you've liked what I have done with their stuff!

Resources

Substrate: Tando Creative 3D Basket (3DBASKHAND)

Dies and Stamps
Sizzix Big Shot Pro
Sizzix: Flower, Build a flower#3 655969
Sizzix Tim Holtz Alterations:  Tattered Florals 656640, Mini Tattered Florals (Movers and Shapers) 657488, Base Tray 657007
Artemio Alpha stamps ARTA61
Stampin' Up!: Swallowtail

Paint and Ink
PaperArtsy: Nougat (my absolute favourite colour!)
IndigoBlu: Hot Cocoa, Peppermint Tea
Stewart Gill Alchemy: White Hot
Dylusions: Fresh Lime, Black Marble
Distress Ink: Evergreen Bough, Walnut Stain
Distress Stain: Evergreen Bough, Black soot
Archival Ink: Watering Can

Bling and other stuff
Twinkling H2Os: Plum Crazy, Red Pearl, Poppy Red, Persimmon
Stampendous Embossing Powder: Detail gold
Card Candy
Tando Creative Masks: Leaves set of 2 (MSKLEAVES2), Harlequin (MSKHRLQUIN)
Prima flowers, eyelets, brads, beads, oasis, florists wires, all from stash

Saturday, 20 July 2013

Build me up Buttercup - Hels Sunday Stamper

Hi all!  This week, Hels' Challenge was Build Me Up Buttercup - all about layers.  I did the layers, but stuck with the buttercup idea as well.


Not sure it comes out well on the photo, but there is the main door hanger, which was covered with coated cardstock, and then acetate above that.

So a bit more detail:  I've got back into alcohol inks as a background, so on the glossy cardstock I created a meadow and sky sort of background.  I scraped translucent paste through a flower mask.  As the paste dried it pulled through a little of the ink behind (not much, as in this heat the alcohl ink dries REALLY quickly!!)


I stamped the buttercup twice onto cardstock, and then on to some dried out babywipes!  Someone at work decided to rip into the packet of babywipes, rather than go in through the top, the normal way.  They dried out and were about to be stuck in the bin, but no...  I think I had three stuck togther, and they were a bit like a piece of felt!  Dripped on gold and green alcohol ink and left it to dry.  The cardstock I used detail clear embossing powder over gold ink, then coloured them in with promarkers.

I cut the acetate to size, and dabbed a bit more gold (and pearl) alcohol ink mixative on the back side of it.  I mounted it up on foam squares, which I then had to cover (oh dear, more bling!) with some lovely prima flowers and butterflies.  I had a gilding flakes butterfly left over from the IndigoBlu challenge last week, and if THAT wasn't bling-y enough, a couple of squirts of mica sprays, just to tie it alltogether.  Suspect I may have been a bit heavy handed on that one, but hey, does it shimmer in the sunlight!  And that was the effect I was going for!!

Hope you like!

Resources

Substrate - Stamps Away Door Hanger

Paint and Ink
Adirondack - Alchol inks, various colours
Brilliance ink - Pearlescent Ivy, Galaxy Gold
Promarkers - various

Stamps
PaperArty Hotpicks - HP1009 Happiness
IndigoBlu - Wild Meadow WM1

Bling and other stuff
Dreamweaver Embossing paste - translucent
Prima Sunrise Sunset flower stencil
Prima flowers and butterflies, mainly Engraver range, I think...
Stampendous embossing powder - detal clear
Acetate from stash
IndigoBlu Megaflakes - Lancashire tart
Cosmic Shimmer Shimmer mist - tarnished gold, bronze blush

Saturday, 13 July 2013

My Favourite Artist... Tando Challenge

Hi all!  The current challenge from Tando is my favourite artist.  I have taken a musical view of this, as there is not a chance of me doing a Titian or similar!  I have been thinking about a wall hanging like this for a while, and finding these wonderful canvas boards galvanised me into action!  I love the music of Southside Johnny and the Asbury Jukes, it really puts a smile on my face, so here it is!


As I said, I started with a 12 by 12 canvas board - I first came across Southside in the days of vinyl, so it seemed right to mimic an album sleeve, sort of.  I had in my possession a 30th anniversary sticker, unused from a gig when I first moved to Bristol.  The sticker is the same size as a record label, so, that is where I started.  I cut a rough circle from black paper, and used a toothbrush with some silver and black acrylic paint to mimic grooves. 

I swooshed several shades of blues onto the canvas, in similar shades of blue to the sticker.  Then I used the end of a kitchen roll tube to add white circles on the canvas.  finally, I used a music stamp around the edge.

I then tore some corrugated cardboard and stripped it back a bit, and painted it to match, including the white circles.

A couple of months ago, I made up a Tando desk tidy. It came with musical notations,; I didn't use them on the desk tidy, but they were perfect for this!!  I painted them up with black acrylic but they got lost against the black card.  So I recoloured them in silver.

I have a LOT of Southside albums - the biggest section in my CD collection.  It was difficult to choose which ones I wanted to use on my hanging, but these albums all have a special song on them, or I bought at a gig, or some other happy memory.  I printed them off on the computer, having resized them all to match.  I sprayed them with a fixative, and then with a spray gloss, to make look a little like album sleeves, and mounted them on the painted corrugated cardboard.

I used my Cropodile to set in some eyelets, and a piece of sari silk as the hanger.  Still not quite sure about this bit, but having made the holes, it will be easy to change the hanging accoutrements when I make my mind up.

I assembled the various pieces, and now I have a wall hanging which will make me smile every time I look at it.  If you need a bit of rhythm in your life, listen to The Fever  or Hearts on Fire (not on YouTube unfortunately!)...if you get the chance to see them, take it!  I guarantee you will be grinning after 10 minutes, if not sooner!!  Just brilliant live!

PS I love them so much, guess what car I have?  Yup, a Juke!!  Haha!

Hope you like!

Resources

Substrate - 12 x 12 canvas board

Paint and Ink
IndigoBlu: Grandma's Teacup
DecoArt: Traditions Prussian Blue, Cobalt Blue; Americana Lamp Black
PaperArtsy:Pea Coat translucent
Adirondack: Silver Paint dabber
Stazon: Midnight Blue
Stampin' Up:Whisper White Pigment ink

Stamps
Kitchen Roll tube (!)
Prima: Recital 4x6

Bling and other stuff
Cosmic Shimmer dries clear glue
Sari silk